Saturday, March 16, 2019

Jalapeño Cornbread Muffins

Woulda looked better with two jalapeno slices on top...

Got muffin pans for dad's kitchen as the ones that were still there were vintage 1940's, and while their pressed designs were retro and lovely, everything stuck to them, no matter how well they were greased! My poor sis made mini meatloaves for dad and her one night while she was visiting. She told me that even though she'd greased them and even with the fat of the meat, she absolutely couldn't get them out of the muffin tin in one piece. Off I went to Amazon.com to see what I could find. And I found them! They're teflon, but unlike the usually flimsy teflon baking pieces that are hard to control, this brand has a metal surround and handles that keeps everything upright and spill-proof. (You can find the two I bought here and here.) 
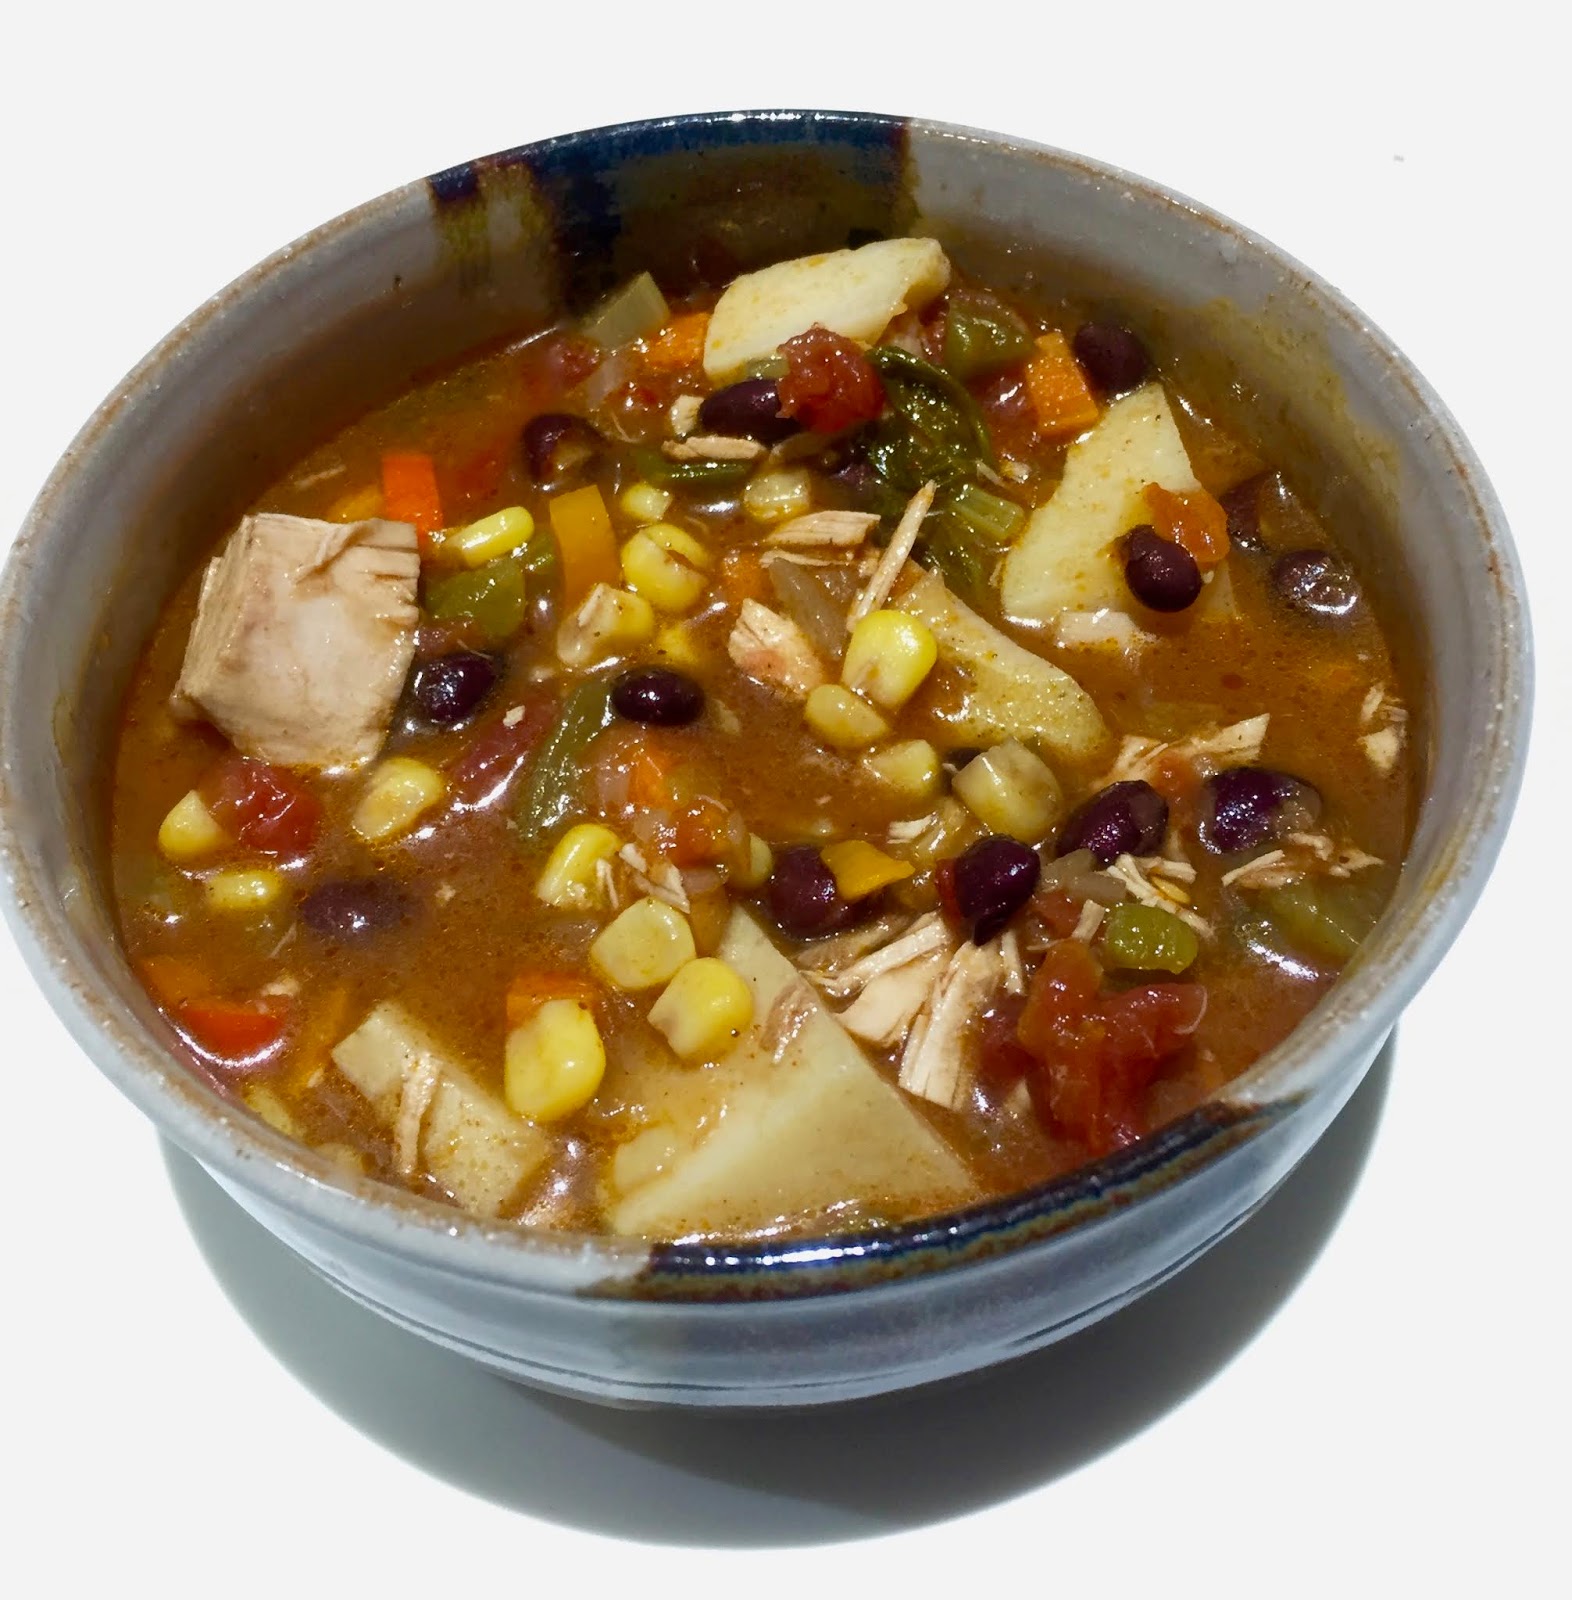
The other day, I'd made Red Lentil Chili for dinner for Dad and I and our family friend Paul. Dad and I thought we needed something more than just chili and toppings, so I decided to venture into making Jalapeno Corn Muffins. As I'm definitely not much of a baker, this was the first time I'd ever attempted to make any! After perusing many recipes online, I settled on the below take - that was heavily inspired by a recipe on the food blog isabeleats.com (you can find the original recipe here). It turned out to be a delicious winner! 

1 C., rounded, coarse-ground cornmeal (Bob's Red Mill)
1 C. white flour
1/4 C. sugar
1 rounded T. baking powder
salt to taste
1 C. milk
2 large eggs
6 T. melted unsalted (always) butter
1/4 C. or so shredded cheddar (no more than 1/4 C.)
3 jalapeño peppers, seeds, spines and all, coarsely diced
1 15.20 oz. canned yellow corn, drained - reserve liquid

1 - 2  whole jalapeños sliced into rings

Preheat oven to 400º. 
Place all dry ingredients in the bowl of a Cuisinart and pulse to mix. Add the wet ingredients and pulse to mix. Add the jalapeños and cheese and pulse until the peppers are the consistency you want. Remove to a bowl and stir in the drained corn. (At this point, if batter is too heavy, add the corn liquid, a bit at a time, until you get the consistency you want.) Spray the teflon muffin pans (not necessary, but I did) and divide the batter evenly between the cups, all about 3/4's full.  (I filled the six regular sized cups you see above and about 8 of the half-size 12-cup muffin pan.) Place 1 - 2 rings on top of each filled cup. Bake for 15 minutes or until a toothpick inserted in the large cups comes out clean. Remove muffins from the pans to a cooling rack. 
If you're using two different sized muffin pans, as I did, bake the larger pan about 5 - 6 minutes, then add the smaller pan to the oven and continue baking another 10 - 12 minutes.

Serve warm with sides of unsalted butter and honey. 

Delicious with chili! This could also be baked in a well-greased cast iron skillet. 


~~~

'till we feast again! 

xoabb

Wednesday, February 27, 2019

Red Lentil (plus some other things) Chili

jalapeno corn recipe to come!
In our effort to make different freezer meals for dad, and ones that are healthy to his standard, I ventured out to find a chili recipe that was more vegetarian than ground beef. I found a wonderful recipe (it turned out) for a red lentil-based chili. Since discovering Big Batch Red Lentil Soup (recipe to come), red lentils have held a near and dear corner of my heart. I don't like the army green color of cooked green lentils, but the bright color of red lentils? That's the best! 
Dad and I first had this for lunch, then, we invited Paul and Marla for dinner the next day. I needed to augment the chili offering, so supplemented it with those delectable jalapeno corn muffins (recipe to come). Dad said he had about a pounds worth of ground venison in his freezer and asked why couldn't that be added to the chili...so we did! Ended up being one of the best chili soups we've ever had! 
This recipe was inspired by a vegetarian/vegan webite recipe. It's called Minimalist Baker, and while none of our family is vegetarian/vegan, we do enjoy recipes and meals from that slant. Even before adding the venison, their recipe is one of the very finest chilis I've ever tasted! Go here for the original. 

It's also the first time I've ever used smoked paprika in a recipe. What a GREAT flavor! The depth it adds is just amazing! 


Here you go - amount as you'd like: 


avocado/olive oil for sauteeing
1 medium onion, chopped
3 - 5 mini sweet peppers, chopped
salt and fresh ground pepper to taste
1 - 2 jalapenos, seeds and all, chopped
4 cloves garlic
3+ T. chili powder
2+ T. ground cumin
2 t.+ smoked paprika (important flavor)
2 15 oz. cans diced tomatoes
3 T. tomato paste (I use the one in the tube)
1 3/4 - 2 or so C. water
1 C. dry red lentils, rinsed and drained (if you want, I didn't)
1 15 oz. can dark kidney beans, not drained of all liquid
1 15 oz. can black beans, not drained of all liquid
1 15 oz. can plain corn, drained

Heat a large pot over medium heat. Add oil, onion and peppers. Season with salt and pepper and saute until onions are becoming opaque. 
If you have a mortar & pestle, place the jalapeno and garlic in it and crush into a rough paste, if not, just chop both very finely. Add to the pot. Add 2 T. chili powder, 1 T. cumin, 2 t. smoked paprika. Bring to a low boil. 
Once boiling, add the lentils and then at a very gentle simmer, cook for about 15 minutes or until lentils are getting tender. As it's cooking, add more water if it's looking too dry and thick and the lentils aren't submerged. 
Add the kidney and black beans, more salt and pepper if needed, and remaining chili powder and cumin. 
Bring to a low simmer and add the corn. Cover and low simmer for about 20 - 30 minutes to meld flavors. Do stir every once in a while.
Taste and adjust seasonings - I added more chili powder, cumin and quite a bit more smoked paprika. 


Serve with jalapeno corn bread muffins (recipe here) and sides of:
Fritos corn chips (a must!)
sour cream
sliced scallions/green onions
shredded cheddar cheese
diced avocados

~~~
To do the meat add-in: 

1 lb. ground venison (or beef)
2 T. butter (for venison as it's not fatty)

In a skillet, melt the butter and add the venison. Brown, stirring and breaking apart until the meat is done. Draining any oil, add to the chili pot and simmer for another 20 minutes or so to blend all the flavors. Taste and correct the seasonings. (Once again, I added more chili powder, cumin and smoked paprika.)

dinner with family and friend is ONLY the best!

~~~

Yum!

'till we feast again!
xoabb

Sunday, February 24, 2019

That Tuna Noodle Casserole - no Cheddar!

fresh out of the oven...

I just got back from a lovely week-long visit with my dad. We Bumgarner siblings have been going to COMO as often as we can for quite a few years now as, for several years before she died, our mom could no longer travel because of health issues and we all wanted to spend as much time as possible with her, and now, our dad. And while dad is a very healthy, robust 95 year old, we realized after his one and only trip after mom died, to visit my family in CT, it became quite clear traveling by plane was something he just shouldn't do any more because the exposure to illnesses, which would be no big deal for younger folks, could be devastating for him. Dad went home from that trip (which was absolutely wonderful while he was here) and was very sick from some bug he most likely caught on the plane. He and we all realized then that it just wasn't worth the risk of him traveling to us. So we go to him! And that's just fine with the three of we siblings as we all going home to our COMO (COlumbia, MO). We all grew up there, leaving only when we went off to college, and we all had a magical life there. The wonderful memories of that time are many.
Mom and dad were married for 8 days short of 69 years. And they lived a true love story. Until the very end of mom's life, you could literally see the love flowing between the two of them with each look they gave each other. Both of them were also very pragmatic about this life and death thing all we humans go through. Though dad misses her to this day - we all do - he has gotten on with his life and made it a good one. It's not a hardship to be around him as he's such a positive guy that goes out if his way to make his life one worth living. 
While dad has become quite the cook - his salad making skill has become famous amongst family and friends - he's told the three of we children he misses mom's cooking. As anyone who knew her knows, mom was a cook that was most definitely in the chef category. I've never met a finer cook! So, though Carrie, Bill and I haven't yet achieved her culinary magic abilities, we've each taken on stocking Dad's freezer (we even got him a deep freezer for this) with homemade goodies whenever one of us is home. While some of dad's favorite mom dishes aren't freezer-friendly, a lot of them (or our rendition of them) are. This time, it was my turn! Loaded up his freezer with tuna noodle casserole, chili, veggie quiches, sunshine chicken curry, chicken-veggie stir-fry, peanut butter pies, apple crisps, etc. Found out that one of his favorite mom dishes, a salmon loaf, wouldn't need to be made because it got "lost" in the freezer underneath a bunch of veggies. That had been made by my sis over Christmas, so is still good to go. 
Below is the recipe for tuna noodle casserole. It took me forever to find a good recipe that didn't have cheddar cheese in it. While cheddar is fine for the top of a tuna melt sandwich, to me at least, it doesn't belong in tuna noodle casserole. Below was inspired by a recipe I found on the food blog "Tastes Better From Scratch"
As always with savory recipes, amounts can be changed to suit your own tastes. On a note, I've been using mini sweet peppers in place of regular sized peppers. Their skin is much thinner and the flavor is wonderful. They are all different sizes and colors (no green) so use the amount you want. Click here for an example - there are many brands, one not being better than the other.


for the topping: 
1 C. panko bread crumbs
2 T. butter

Melt butter in a skillet, add panko and saute, stirring constantly until the panko is coated with the butter and toasty brown.

for the casserole:
3/4 of a 1 lb. box medium size shell pasta
6 T. butter, divided
3 inner ribs celery with leaves, thinly sliced
1 small onion or equivalent scallions, chopped
2 - 4 mini sweet peppers, quartered and thinly sliced
2 cloves garlic, minced
1 C. baby peas
4 - 6 T. flour
1 C. milk, warmed - more for thinning if necessary
2 C. or so chicken or veggie stock, warmed
salt & freshly ground pepper to taste
white pepper to taste
1 T.+ fresh dill, chopped
1 - 2 T. fresh lemon juice
1 C. grated Parmesan cheese, divided
12 oz. can albacore tuna in water (drain or use water for liquid)
veggie spray for casserole dish

Preheat oven to 350º. 
Cook pasta shells until al dente and set aside in a large bowl. Melt a T. butter in a skillet and add the celery, onion, peppers and garlic. Saute until onion is becoming opaque. Remove veggies from skillet and add to the pasta bowl. Add remaining butter to the skillet along with the flour. Whisk for a minute or so, not letting the butter/flour mixture to get too brown. Slowly stir in the milk and stock and whisk continuously until all is warm and smooth and thickened. No lumps! Reduce heat to low and whisk in the salt, fresh ground black pepper and white pepper, dill weed, lemon juice and half the parmesan cheese. Heat through, taste and correct any seasonings to your taste. Pour over the pasta and veggies; stir in the tuna and peas. Mix well and pour mixture into a veggie sprayed casserole dish. Top casserole with the remaining Parmesan and then the toasted panko crumbs. Bake for 30 or so minutes - until it's nice and bubbling. Serve and say YUM!!
All stirred together
ready for the Parm and panko

~~~

ready for the initial freezing

If you are making this to stock your freezer, get aluminum containers for the serving size you need. In dad's case, I used mini loaf pans (and 1 mini pie pan) so he could have a meal one night and then lunch for the next day. Put together the casseroles and freeze (on a sheet pan if possible - makes it easier) When frozen, cover each pan tightly with aluminum foil and the put them in freezer zip-loc bags. To bake, loosen the foil on the top of the pan and bake in a 350º oven for about 30 minutes. Remove foil and continue to bake until heated through and bubbly. Test center of the casserole to be sure all is cooked. 

Oh, and here's dad's salad that accompanied our tuna casserole:
tonight, dad added tomatoes, avocados and apples 

~~~

Yum!

'till we feast again!
xoabb

Saturday, February 16, 2019

Tasty Tuna Melts

Ready for the broiler!

Until last night, I'd never eaten a tuna melt, let alone made one! Last night, I discovered we had no food in the house that wasn't frozen and I really didn't want to go to the grocery store, so I gathered the cans of tuna that were in the pantry and racked my brain trying to come up with something to do with them. Hmmm...tuna melts! Never made them, but how hard could it be? Not hard at all, it turned out - and delicious to boot. 

As is usual with my recipes, the amounts of everything is to your taste - and this would also be delicious with sweet pickle relish, red pepper, red onion or shallots, etc. Just add what you happen to have on hand. I usually buy tuna packed in water, but on had I had one of those and one packed in veggie oil, so that's what I used. And after tasting both the cans of tuna, the one packed in oil is much better tasting than the one packed in water. Calories tho...

2 cans albacore tuna, one in water, one in veggie oil, well drained
3-4 inner celery stalks, leaves included, finely chopped
3-4 green onions/scallions, green part included, finely chopped
1 t++ fresh grated black pepper (we like it with a pepper kick)
splash+ Pompeiian brand (my favorite) red wine vinegar
splash+ Heinz apple cider vinegar (favorite again)
1/4 - 1/3 C. Hellman's mayonnaise (yep, favorite)
sharp cheddar cheese, shredded or any good melting cheese
2 - 3 slices peasant/country hearth bread, toasted

Heat the broiler. 
In a bowl, mix together ingredients through the vinegars. Taste and correct for seasonings or other ingredients. Add the mayonnaise, a spoonful at a time, until you have the consistency you like (I like it to be not overly mayonnaisy so that the other flavors shine through). Spread mayonnaise on the toast pieces and then spoon the tuna mixture evenly on top. Cover the top with the cheese - be careful not to use too much. Broil until cheese is melted and bubbling. Serve immediately. 
All melty and ready to go!

~~~

Yum!

'till we feast again!
xoabb

Wednesday, February 13, 2019

Baked Salmon

baked salmon, hash browns & sauteed baby spinach - YUM!

I have a love-hate relationship with salmon. LOVE it for a bit, then can't even bear the sight of it for months on end! Don't ask me why...I just don't understand it at all! However, the other night was a salmon night as it looked fresh and wonderful at the fish counter. While I usually buy wild salmon, this time is was Norwegian-farmed salmon. While it isn't nearly as good for you as wild salmon, it certainly tastes wonderful! 

For two folks: 

3/4 - 1 lb. salmon fillet*
3 T. mayonnaise
1 T. Dijon mustard
1 T. pure maple syrup
1 - 2 T. Victoria Taylor's toasted sesame ginger seasoning (sesame seeds 54%, ginger 22%, garlic powder, sea salt, cayenne, toasted sesame oil)


Preheat the oven to 425º F. 
Mix together all the ingredients (not the salmon, duh!) (If you don't have the Victoria seasoning (which you really need badly), look at it's ingredients and add them individually to the marinade.)
Put parchment paper or foil on a cookie sheet, smear a bit of the marinade on it and place the salmon fillet on top. Evenly coat the salmon with the marinade. Bake until it easily flakes, about 15 - 20 minutes. Serve. 

(*Slice the raw salmon into individual servings before baking - makes it easier to serve.)
(I love parentheses.)

We ate our salmon with hash brown potatoes and fresh sauteed baby spinach. 


~~~

Yum!

'till we feast again!
xoabb

Tuesday, February 5, 2019

Peanut Butter Pie - No Oven Required!

drizzled with chocolate syrup certainly puts this pie slice over-the-top!

I served this pie to my hubs, GB, last night. His comment? "Damn, Ann, why did it take 41 years for you to figure out how to make a dessert during the weekdays? This is fantastic! It would have been even more fantastic if you'd started giving it to me 41 years ago! You have a LOT of desserts to make up for!" Hmph!

Earlier this week, I saw a recipe for peanut butter pie (which I'd never heard of before, let alone tried) on that wonderful website, Skinny Taste. I can certainly understand how savory foods can be made less caloric and better for you, but sweets? Really? How can you possibly skimp on fats and sugar and have anything that's edible? Not a believer here! So! I decided to make the ST peanut butter pie (2nd recipe)  and a second pie (1st recipe) that was the full fat/sugar version. Went off to find a recipe for that full fat/sugar recipe online and there were hundreds of them! Wow! It looks like peanut butter pies are wildly popular! Whoda thunk?? 
While I followed the ST recipe as closely as I could (used Jiff peanut butter and fat-free Cool Whip instead of the recommended Better n' Peanut Butter and Truwhip because I couldn't find either of those products (links to both below recipes), I sort of did my own thing with the second pie, using the same basic ingredients, but not exactly the same amounts as in the recipes I'd found.
Amazingly, Ms. Homolka's ST recipe was delicious. It didn't have the volume the full fat/sugar version had, but it had just as much flavor. The full fat version was much prettier, and also felt a lot heavier in the belly once consumed. (Know this is truth, having had a piece of each, one day apart.)

So the question of the hour is: Which would I make again? Either! They're both so good! Each have their advantages - tho ST even more so if you're using the WW points system. If you love peanut butter, this is the dessert for you, no matter which recipe you use! The first recipe is what I threw together, the second is by Ms. Homolka of Skinny Taste.


1st recipe - the full fat/sugar version - delicious!


The throw together:

1 C. Jiff peanut butter
6 oz. cream cheese, room temp.
1/2 C. powdered sugar
1 t. vanilla extract
1 container Cool Whip, thawed
1 chocolate graham cracker crust (bought)
Hershey's chocolate syrup for drizzling (optional)

Mix together peanut butter, cream cheese, powdered sugar and vanilla extract with an electric mixer until smooth. Fold in Cool Whip and vanilla and the finish smoothing all out with the electric mixer. Scrape into the pie shell, cover and refrigerate for at least 2 - 3 hours. When serving, drizzle chocolate sauce across the pie or across each serving piece.

~~~

2nd recipe - the Skinny Taste version - not as fluffy, but still delicious!


5 oz. 1/3 fat cream cheese, softened
1/3 C. powdered sugar
1/3 C. Jiff peanut butter (Better 'n Peanut Butter* substitution)
1 container fat-free Cool Whip (Truwhip** substitution)
1 graham cracker pie crust
2 T. Hershey's chocolate syrup (optional)

Beat cream cheese and confectioners' sugar together in a medium bowl.
Mix in peanut butter and beat until smooth. Fold in Cool Whip.
Spoon into graham cracker pie shell; cover and refrigerate unti firm, at least 2 - 3 hours.
Drizzle with chocolate syrup before serving.

*Better 'n Peanut Butter
**Truwhip Skinny Topping

(I used fat-free Cool Whip instead of light Cool Whip to make up for the fact I used peanut butter instead of Better 'n Peanut Butter.)


~~~

Yum!

'till we feast again!
xoabb

Thursday, January 24, 2019

Tuna Poke - A Hawaiian Delight Brought to CT!


This with Tostitos scoops - let the yum begin!
Last night (wrote this last Monday), as part of our Sunday Family Dinner, daughter Brynnly made one of our very favorite appy's - tuna poke (btw, ~poke~ rhymes with ~okay~). Though it's never the same taste twice, each time it's a delightful combination of flavors that "speak" to the tastebuds. 
All amounts revolve around the amount of tuna you are "pokeing" - which literally means "to cut cross-wise into pieces" - and how much of the other ingredients you want to add. While mayonnaise isn't part of her mixture every time, always included in Brynnly's poke are tuna of course, avocados, onions, jalapenos, ginger, soy sauce, lime or lemon juice and Frank's Louisiana hot sauce. Before last night, toasted sesame seed oil would have also been on that list, but as we didn't have a speck of it in the house (a gross over-sight on my part), it came off the list as our poke was over-the-top delicious! Here's what Brynnly threw together last night:

Please note that all seasonings are to your taste.

the essentials:

1/2 lb. Ahi tuna - sushi grade, cut into strips, strips cut in pieces
1 avocado, cut length-wise, then into pieces
1/2 medium onion, chopped
1 jalapeno pepper, chopped

the seasonings: 

2 or so T. hoisin sauce
2 or so T. soy sauce
2 or so T. mayonnaise
Frank's Louisiana hot sauce, to taste
1/2+ fresh lime, squeezed
2 t. ground ginger or equivalent fresh grated ginger
1 T.++ "Victoria Taylor's Toasted Sesame Ginger"
BumHot/cayenne pepper to taste

Mix all and taste to correct seasonings. 

Serve in a lovely bowl with Tostitos Scoops on the side.

Grated orange, lemon or lime rind is a lovely addition, as is toasted sesame oil, plain toasted sesame seeds, green onions/scallions, chopped cucumbers or radishes- the possibilities are endless. The choice is yours!


~~~

Yum!

'till we feast again!
xoabb

Tuesday, January 22, 2019

Fresh Chanterelles over Fettuccine - Another MumBum Delight!


Chanterelle & fettuccine deliciousness, ready to serve family-style

During our 2016 summer sojourn to see my parents in Columbia, MO, there occurred a chanterelle mushroom frenzy, the likes of which we had never seen before or since. I'm sure in the 30 plus years mom and dad have lived on their 50 acres that there have been other years prior to 2016 where there has been a good harvest, but we hadn't discovered chanterelles yet, so have no idea if there was. A shame! The Summer of 2016, there was no way you could miss them, they were so plentiful - and everywhere! In the two summers since, it was so dry in COMO the chanterelles didn't have a chance to grow. We couldn't find even one, and, boy, did we spend a lot of time looking! We're hoping this August 2019 brings good growing weather because we all miss those fresh chanterelles like crazy! This dish was served along with the chiles rellenos that was posted yesterday.

1 - 2 T. olive oil
1 C. chopped yellow onion
2 - 3 t. minced garlic (to taste)
4 T. unsalted butter (1/4 stick)
1 lb. fresh chanterelle mushrooms, cleaned (a dry pastry brush works well)
salt (to taste)
8 - 10 oz. fettuccine
3 T. Amontillado sherry
1 1/2 C. heavy/whipping cream
BumHot to taste (mom & dad's homegrown, dehydrated, ground red pepper mix)
salt & fresh-ground black pepper to taste
Parmigiano-Reggiano, grated or shaved, to taste
parsley, chopped, for garnish if desired


Slice the bigger mushrooms into large pieces, about 1 1/2" x 1/2"; quarter the medium-size ones and leave the small ones whole - they should all be similar in size. Set aside. 
Add oil to a large skillet that's over medium heat. When the oil is hot, add the onion and saute until it is soft and light golden, stirring frequently, about 4 minutes. Add the garlic and saute until aromatic, about 30 seconds. Add the butter, mushrooms and salt to the skillet and saute, stirring occasionally, until until the mushrooms are tender, about 5 minutes.
The sauteing chanterelles

Add the sherry to the skillet, bring to a boil and cook, stirring, until alcohol is evaporated. Add the cream, bring to a boil , then reduce heat just to keep warm. 
Meanwhile, cook the fettuccine in well-salted water according to package directions. Drain, reserving 1 cup of the cooking water. Add the fettuccine to the sauce, and toss to combine all the flavors, rewarm and reduce the sauce as needed. As the pasta sits, some of the sauce will be absorbed, so add some of the reserved cooking water to loosen it to the desired consistence (if needed). Season with the pepper and toss again. Taste and correct seasonings. 
Serve at once on individual plates or family style (like above photo), garnished with some cheese and the parsley. Serve with more cheese on the side. 

A very VERY large just harvested chanterelle


Yum! 

'till we feast again!
xoabb

Monday, January 21, 2019

Chiles Rellenos - a MumBum Delight

Done! Now the yum begins!

My mom, as you know, was one hell of a cook - an amateur chef by today's definition, as she had no professional training. Her mom, both grandmothers and various other family members taught her not only the basics, but also a bunch of wonderful, lasting family recipes that are used to this day. Then she just took off from there - a natural gourmet in the kitchen! She could devise recipes out of nothing, glorious food out of odd ingredients, redo recipes until they suited her, and just come up with things that no one else could. 
In this particular case, she decided that traditional fried chilies rellenos were ok, but the over-riding taste was grease/fat, even though they were loaded with all kinds of flavorful goodness. SO! She took it upon herself to revise the typical, classic deep fried chilis rellenos...she decided they needed to be baked! Since tasting mom's baked dish many many years ago, I can't order them in any restaurant, ever, because they're always fried! (Yes, I ask.) And that really takes away from what their flavors should be. Once you've tasted baked, you'll never be able to tolerate fried again.
Whenever we have these for dinner, there's a whole lotta dinner table trading going on! There are those of us who like spicy and those of us that like mild, and the thing with poblanos is you can never tell until you have had a bite what the hot level is. Though they're never blisteringly hot, some have a lot of heat while others don't. So, we trade around the table until everyone has the hot or not hot level they want. Fun!
The last time I shared this meal with mom and family (summer of 2016) we also had oven-fried zucchini, dipped as the poblanos are, (you can see those above, next to the poblanos), chanterelles over creamy fettuccine (posted here on 1/22/19) and fresh tomatoes & cucumbers from their garden. What a beauteous meal!

2 poblano chiles per person
Mexican white cheese or Monterey Jack cheese, cut in strips
flour
eggs
grape seed or vegetable oil
bread crumbs, plain - regular or panko

Preheat oven to 350º.
Using a butane-type hand-held torch (Wal-Mart, about $7.00 each), scorch/blister all the skin on the peppers, one by one. After each is scorched, put them in a paper bag so they can steam. When all have been scorched, remove them one by one and scraped off their skin with the edge of a paring knife. I do this under cold running water, tho purists say the peppers should never touch water. I say hmph! Pat them dry. Using a pair of thin-bladed scissors or a paring knife, make a slit in the side of the pepper that faces up. Carefully remove the seeds and any membrane they are clinging to. Fill the pepper with cheese. Not too full, but just enough. 
Beat together the egg(s) (1 egg per 1 or 2 peppers) with a tablespoon or so of oil. Carefully roll the pepper in flour, then in the egg mixture and then in the bread crumbs. Place on a parchment paper-lined cookie sheet, that's been sprayed with Pam. If baking zucchini slices as well, follow above flour/egg/bread crumb routine. Bake all for about 1/2 hour.  Serve and swoon!


~~~

YUM!

'till we feast again!
xoabb 

Sunday, January 20, 2019

Sweet & Sour Pork

Sprinkle with soy sauce and bite into deliciousness!

On of my favorite Chinese food dishes is sweet & sour pork. However, I grew up in the Midwest in the '60's and my exposure to Chinese take-out was quite limited, partially because we lived outside the city limits at the time, Chinese take-out restaurants were few and far between in Columbia, MO, and delivery non-existent. A lot also had to do with the fact that my parents (and both sets of grandparents) had huge gardens that supplied not only most of our seasonal food, but was canned/frozen/dried for non-seasonal consumption. 
Eventually, when I was just about ready to head off to college, a very up-scale Chinese restaurant opened and I remember eating there with my family once or twice. Can't remember what I had, but I know it was several steps above your typical take-out. 
Funnily, I was exposed to Japanese cooking over the years as mom brought back cooking ideas from her and dad's time in Japan after dad was through serving in the Korean war, and there were several times we had Japanese exchange students visiting (don't think they lived with us...can't remember) and they would cook us a traditional Japanese dinner. 
When I went to college, I became good friends with Janelle our freshman year. During later college years, Janelle lived in an apartment and that was great, because she was quite the cook!  Sweet & sour pork was one of her specialties - and it was delicious! The recipe below is a bit of her original (40 years on!) recipe, a lot of it comes from a recipe I found on a favorite website of mine The Spruce Eats, and a I was making this with our friend, Alex, who had cooked in the food industry for at least 10 years and really knows his food and how to cook it a lot came from him.

I've always stir-fried the pork that has been cut in strips, but this time I followed The Spruce Eats instructions to chunk the pork, coat it and deep-fry it. Not as healthy, but man, was it good!
This is fantastically tasty!

Amounts and colors of peppers are to your taste, onions as well. 

for the pork and it's marinade

2 - 2 1/2 lbs. pork, cut into chunks (I used boneless chops)
4 T. soy sauce
2 T. rice vinegar
1/2 t. Chinese 5-spice powder, or substitute with (what I did): 1/4 t. each of ground ginger, ground cloves & ground cinnamon
1/2 t. white pepper
2 t. garlic powder or 4 cloves garlic, minced
2 eggs, lightly beaten
6 T. corn starch
2 T. white flour

Combine all ingredients through eggs in a ziploc bag and shake to mix well. In a small container, combine the egg, corn starch and flour and mix well - a stick blender does the trick nicely. Mix this into the marinating pork and shake and turn bag so pork is evenly coated with all the ingredients. Refrigerate for at least 30 minutes, shaking every once in a while. 
~~~~~~~~

for the sweet & sour sauce: 

1 C. water
1/2 C. Heinz catsup
1/3 C. rice vinegar in a 1/2 C. measuring cup
cider vinegar to the top of the 1/2 C. measuring cup of rice vinegar
1/2 C. sugar
1/2 heaping T. corn starch mixed with 1 T. water
cayenne to taste

Put all ingredients in a saucepan and mix well before you turn on the stove heat. Once heat is on, stirring constantly, bring sauce to a boil then turn heat down and simmer until sauce is thickened. Set aside. 
~~~~~~~

for the deep-fry and final stir-fry: 

3 or so C. oil to deep-fry the pork (I used a Fry Daddy)
2 T. additional cooking oil for the stir-fry
3 cloves garlic, coarse chopped
1 medium onion, coarse chopped
1 red pepper, coarse chopped
1 1/2 green pepper, coarse chopped
1 fresh, cored pineapple, each ring cut into at least 8 chunks
soy sauce, to taste

2 C. basmati rice, cooked according to package directions

soy sauce for the table

Heat the Fry Daddy and when hot, slide the pork chunks in (in batches) and deep-fry till golden brown, but not cooked through, about 3 minutes. Line a plate or sheet with some paper towels and let pork drain there when done. Set aside.
Heat some oil in a wok or large skillet (what I used) and add the garlic and onion. Stir-fry for a minute or two and add the peppers, pineapple and pork. Mix all together and pour on all the sweet & sour sauce. Cook until pork is done, the veggies cook through and the pineapple hot. Serve over hot basmati rice w/soy sauce on the table. 
all that deliciousness just before the s&s sauce is added


~~~

YUM!

'till we feast again!
xoabb 

Thursday, January 17, 2019

Moroccan Stew - YUM!

A delicious-looking Moroccan treat with pitiful-looking naan bread...(sigh)

One of my two wonderful, lovely daughters died four years ago, and, other than simply putting edible food on a table I just stopped cooking. The last few months have seen a renewal in my cooking desires. Maybe it's because it's an honor to cook in Remy's memory, maybe because it's simply that I've managed to move on from complete devastation to lingering, but manageable devastation. I'll always cook in honor of my daughter (and my mom, Mary - one of the best amateur chefs that ever lived), and I now want to do that once again! I'll never be the cooks they both were, but I'll damn well try!

I found this recipe online (of course!) at ambitiouskitchen.com. Though I followed it somewhat, I deviated because I didn't have some ingredients and changed a few others. Pretty sure most folks do this, so, even though it's someone else's recipe, it's changed. Oh dear.


Use vegetable stock and this is a vegetarian/vegan delight.

oil, grape seed or olive, for sauteing
1 medium onion, chopped
6 garlic cloves, minced
3 carrots, slice length-wise and chopped
2 or so t. cumin
2 or so t. cinnamon
1 or so t. tumeric
1/4 or so t. cayenne
1 13 oz. box crushed tomatoes
3/4 can tomato paste
1 14.5 oz. can diced tomatoes
4 C. or so chicken bone broth (or chicken stock)
1 box pre-chunked butternut squash
1 C. lentils (I used Umbrian lentils - it's what I had)
1 15 oz. can (Sclafani - my favorite brand) chick peas/garbanzo beans
salt to taste
black ground pepper to taste
fresh juice of 1/2 large lemon (important)
chopped parsley for garnish

stewing in the pot...

Heat oil in a soup pot and add onions, garlic and carrots. Cook until all is looking slightly done. Stir in spices and saute until spices are releasing their flavors/fragrance. Add everything through the salt and simmer for about 20 - 30 minutes until the squash and lentils are done. Stir in the lemon juice, salt and pepper to taste. Taste and correct seasonings,


Serve with warm Moroccan flat bread, naan or pita bread. A dollop of plain Greek yogurt would be good.


~~~

YUM!

'till we feast again!
xoabb 

Thursday, January 10, 2019

Cannellini & Escarole (Beans & Greens)

Bean & Greens, in this case, escarole
One of our mom's very favorite things was a big skillet of cannellini beans and greens. While she didn't much care what greens she used - she loved them all - my very favorite is escarole. Stew Leonard's has recently begun carrying 9 oz. bags of triple-washed torn escarole, which, along with their canned beans, makes a delicious side dish that's easy-peasy!

Again, a throw 'n go - use whatever amounts you want:

First skillet:
1 - 2 T. extra virgin olive oil
9 oz. escarole, cleaned and torn (any amount, really)
salt & pepper to taste

Heat oil and add the escarole. Saute, about 10 minutes, tossing often, until escarole is wilted and done. 

Second skillet:
1 - 2 T. extra virgin olive oil
2 cloves garlic, chopped
1 can cannellini beans (2 cans if you want)
BumHot (our family's dried hot pepper mix) or cayenne to taste
salt to taste
chicken stock if needed

Heat oil and add garlic. Saute until garlic is beginning to brown. Dump can of beans, liquid included, into the skillet. Stir and cook until all looks creamy. Add chicken stock if and when needed. Simmer about 10 minutes. Dump beans into the escarole skillet and stir all together, cooking a few more minutes. Taste and correct seasonings. Add more chicken stock if desired. Lemon zest would be nice as well. 

This is a wonderful left over! 

~~~

YUM!

'till we feast again!
xoabb 

Friday, January 4, 2019

Flavors of Mexico Chicken Soup


Forgot the tortilla chips...and the chopped parsley/cilantro...

My sis, Care, has been with our dad for the last month or so as she had to have foot surgery and needed one-story living...and she lives in a 3-story town house. A few weeks after her surgery, she felt good enough to stand long enough to make the above soup. The first time, she followed this recipe to a T. And both she and dad decided it wasn't nearly spicy or flavorful enough. We're a family of spicy food lovers! Give us BumHot, cayenne, etc. and we're happy! The second time she made it, she decided to follow the basics of the original recipe and then add her own twists. Instead of 2 T. of a McCormick's taco seasoning packet, she added a packet and a half. She also added two fresh, chopped jalapeno peppers, seeds and all, and a can of black beans. The results were spicy and delicious! 
I made the soup for the first time last night. Followed Carrie's deviations and then instead of McCormick's taco seasoning (because, much to my surprise and then dismay, there were none in my pantry), I used Penzey's bold taco seasonings. Good! My jalapeno peppers weren't nearly as spicy as the two Care used (you never can know how spicy/mild they'll be), but, overall, the soup was delicious! 
This soup is very forgiving as amounts are totally up to your personal preferences. Add what veggies and beans you want, seasoning amounts you want, etc. If you're on Weight Watchers Flexible Points system, this is just about a zero points recipe. The potatoes are the only thing that have points, and they're easily either not used, or eaten around, and there are so few of them, I don't even know if they'd count anyway! 
I didn't have 2 cans of black beans, so used one can black and one can cannellini beans. 

Delicious! 

All amounts are to taste: 

extra virgin olive oil or grapeseed oil for sauteeing
1 medium large onion, coarsely chopped
2 or so celery stalks, coarsely chopped
3 or so carrots, scrubbed, coarsely chopped
2 jalapeno peppers, chopped, seeds and all
2 - 3 mini sweet peppers (any color), chopped
4 oz. can diced green chilis
15 oz. can petite diced tomatoes (use 2 cans if desired)
1 can black beans, drained and rinsed
1 can cannellini beans, drained and rinsed
3 - 4 small white potatoes, washed and chunked
1 1/2 packets McCormicks taco seasoning or equivalent Penzey's bold taco seasoning
1 whole chicken breast, skin on, bone in (or use meat from a store rotisserie chicken, 4-6 C.)
1 32 oz. box organic chicken bone broth or stock
frozen corn
salt and black and cayenne pepper to taste
chopped parsley and/or cilantro


before the corn was added...

On the side: 
tortilla strips/coarsely crushed chips, avocado chunks, 
sour cream, shredded cheddar cheese, etc.

Place chicken in a medium pot and cover with the chicken stock, adding water to cover chicken. Bring to a boil, then simmer until chicken is done. Set aside in the pot.
Heat oil in a large soup pot and add the chopped onion, celery, carrots and jalapenos. Stir and saute until veggies are softening. Drain the chicken stock into the soup pot and add all the other ingredients except the corn, s/p and chopped parsley/cilantro. Simmer for around 30 - 45 minutes to blend all the flavors. While that is simmering, shred the chicken breast (or pull the meat off your rotisseri chicken). Add the corn and simmer for 5 minutes more. Taste for seasioning and add salt, peppers to taste. Ladle into bowls and sprinkle with chopped parsley/cilantro. Put other condiments on the table in bowls and serve! Enjoy! 

Inspired by a recipe on the website Dinner at the Zoo.


~~~

YUM!

'till we feast again!
xoabb