 |
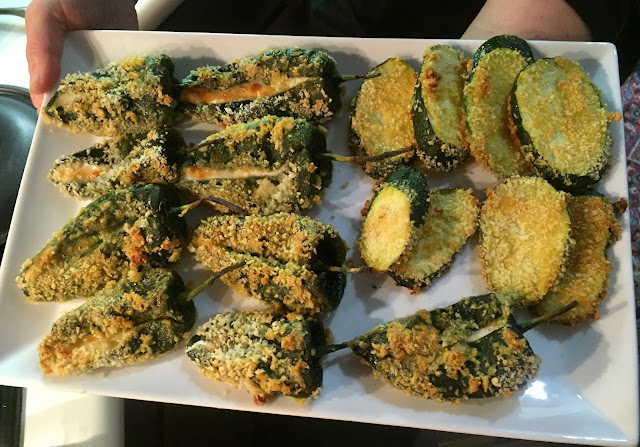
| Done! Now the yum begins! |
My mom, as you know, was one hell of a cook - an amateur chef by today's definition, as she had no professional training. Her mom, both grandmothers and various other family members taught her not only the basics, but also a bunch of wonderful, lasting family recipes that are used to this day. Then she just took off from there - a natural gourmet in the kitchen! She could devise recipes out of nothing, glorious food out of odd ingredients, redo recipes until they suited her, and just come up with things that no one else could.
In this particular case, she decided that traditional fried chilies rellenos were ok, but the over-riding taste was grease/fat, even though they were loaded with all kinds of flavorful goodness. SO! She took it upon herself to revise the typical, classic deep fried chilis rellenos...she decided they needed to be baked! Since tasting mom's baked dish many many years ago, I can't order them in any restaurant, ever, because they're always fried! (Yes, I ask.) And that really takes away from what their flavors should be. Once you've tasted baked, you'll never be able to tolerate fried again.
Whenever we have these for dinner, there's a whole lotta dinner table trading going on! There are those of us who like spicy and those of us that like mild, and the thing with poblanos is you can never tell until you have had a bite what the hot level is. Though they're never blisteringly hot, some have a lot of heat while others don't. So, we trade around the table until everyone has the hot or not hot level they want. Fun!
The last time I shared this meal with mom and family (summer of 2016) we also had oven-fried zucchini, dipped as the poblanos are, (you can see those above, next to the poblanos), chanterelles over creamy fettuccine (posted here on 1/22/19) and fresh tomatoes & cucumbers from their garden. What a beauteous meal!
2 poblano chiles per person
Mexican white cheese or Monterey Jack cheese, cut in strips
flour
eggs
grape seed or vegetable oil
bread crumbs, plain - regular or panko
Preheat oven to 350º.
Using a butane-type hand-held torch (Wal-Mart, about $7.00 each), scorch/blister all the skin on the peppers, one by one. After each is scorched, put them in a paper bag so they can steam. When all have been scorched, remove them one by one and scraped off their skin with the edge of a paring knife. I do this under cold running water, tho purists say the peppers should never touch water. I say hmph! Pat them dry. Using a pair of thin-bladed scissors or a paring knife, make a slit in the side of the pepper that faces up. Carefully remove the seeds and any membrane they are clinging to. Fill the pepper with cheese. Not too full, but just enough.
Beat together the egg(s) (1 egg per 1 or 2 peppers) with a tablespoon or so of oil. Carefully roll the pepper in flour, then in the egg mixture and then in the bread crumbs. Place on a parchment paper-lined cookie sheet, that's been sprayed with Pam. If baking zucchini slices as well, follow above flour/egg/bread crumb routine. Bake all for about 1/2 hour. Serve and swoon!
~~~
YUM!
YUM!
'till we feast again!
xoabb
No comments:
Post a Comment